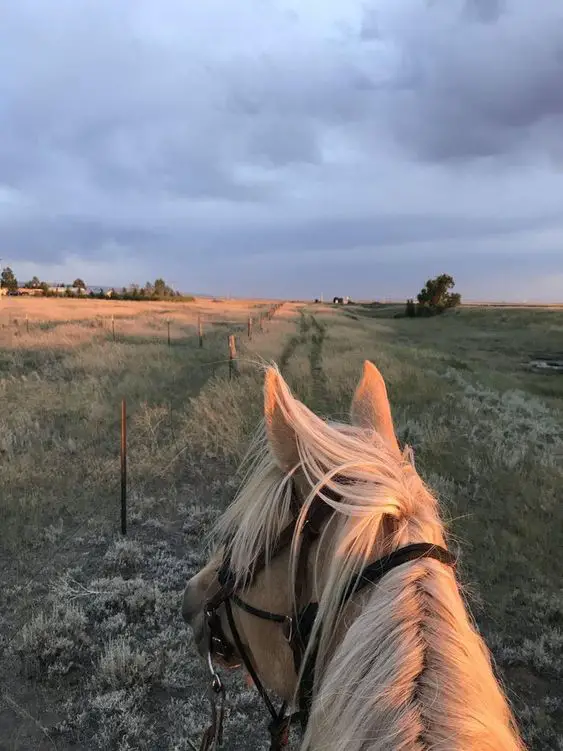
Horseback riding has been gaining in popularity lately. Earlier it was aristocratic fun, now this kind of leisure has become more accessible. Learning to ride a horse is not easy, and how to ride a horse cannot be described in a nutshell. This requires hard training and considerable experience. It is the basics of riding that our article is devoted to.
Before you mount a horse, you need to saddle it. How to do it correctly – you will be prompted at the equestrian school. When landing on an animal, many experience fear, which is transmitted to the animal. Don’t be afraid – mastering this procedure is not so difficult.
It is recommended for beginners to use a landing stand since it is quite difficult to get on a horse right from the ground the first time. At first, have a more experienced rider hold the animal’s head while you sit on it. It also reduces stress on the horse’s back.
You should sit on the horse on its left side.
First insert your left leg into the left stirrup, then lift your body and swing your right leg over the saddle. Then insert your right leg into the right stirrup.
Experienced, well-trained horses are usually provided for beginners, as younger animals may suddenly duck to the side or start moving before you sit on them.
If there is no one to help you during landing – firmly grip the reins in your left hand. This will make it possible to control the position of the horse’s head. But do not pull them too tight, otherwise, the animal will begin to move backward.
Sitting in the saddle, take a position that allows you to maintain good balance. Keep your back straight, do not hunch over. Your ears, shoulders, pelvis, and heels should be in line. Straighten your shoulders. The main load should be in the gluteal region.
With a stable position in the saddle, position your legs correctly. Beginners often don’t do this and twist their knees outward.
The correct position is in which the legs are turned inward. In other words, hug the animal with your legs, as it were, without squeezing its sides too much.
Point your toes up and your heels down. In order to train in advance, stand with your toes on a slight elevation and, keeping balance, lower your heels.
You should also hold the reins properly.
How to do this depends on whether you choose the western or English riding style.
The English style provides for passing the reins in a loop upward through a palm clenched into a fist, after which it is necessary to place both little fingers on the outside of the reins, having previously bend them. Place your thumbs on top and press firmly.
When riding in the Western style, no loops are made on the reins. They are simply tied in a knot at the end. They are held in your left hand, constantly weakened, as if you were holding a waffle ice cream cone in your hand.
English Riding Style
There are many ways to signal the horse to start moving. The English style provides the following:
- lightly squeeze the sides of the animal with your feet – this is the first signal to start its movement;
- if the horse does not react, additional prodding is required: you need to lightly hit the heels on the sides of the horse. Measure your strength! By inflicting pain on an animal, you risk being thrown to the ground;
- sometimes horses are taught to beep, such as clicking their tongue. What signals the horse knows – the instructor will tell you.
And so the movement began.
Move your hands in time with the animal’s head.
When walking, running, or galloping, the horse’s head moves forward / backward in the same rhythm with the whole body. Your hands should also fall into this movement. What for? Very simple – so you will not annoy the horse’s mouth with a bridle. In addition, if your hands do not move, the horse can stop, taking the pulled reins as a signal to stop.
The next step is to learn how to turn while sitting astride the saddle. The English driving style makes this an obvious method.
When turning to the right, the fishing rod is slightly pulled up on the right side, when turning to the left – from the opposite. If the horse does not react, increase the traction slightly until the animal understands your command. The turn signal can also be given using the body and legs.
Look in the direction you want to move. The horse will notice the change in your riding position. Additionally, you can slightly squeeze the sides of the horse with your legs, thereby showing it – it’s time to turn. When turning to the right, push with your left foot, when turning to the left – with your right. Leaving the pressure, the horse goes in the opposite direction from it.
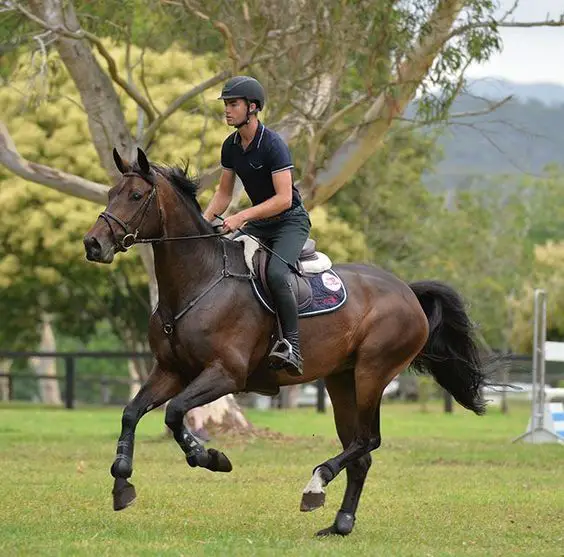
When you feel more or more confident on the step, try to start the horse at a trot.
For it, while moving, squeeze the sides of the animal with your legs, forcing it to accelerate. At the same time, lower yourself into the saddle deeper and control the horse with your feet. Do not relax your elbows, otherwise, the bridle will jerk the horse’s face.
Some riders do not sit in the saddle, but all the time raise the body above it in time with the movements of the animal. This is quite convenient, since the trot is a bouncing gait, and such movements save your soft spot from jolts. This is not at all difficult to do. Just every time the horse brings his shoulder forward – stand up in the stirrups, and on the next step – gently sit back. Try not to do this too harshly so as not to kick the horse in the back.
Once you have mastered the trot, you can proceed to the gallop.
To start the horse with this gait, you need to take your leg back and press it to the side of the animal. A light canter is the horse’s natural three-bar run. Before you test yourself at the canter, practice getting up / down at the trot well. This key move will come in handy.
Try not to strain your body. When riding at a gallop, many beginner riders hold onto the halter or the saddle itself. This helps to avoid falling.
If you give the signal to go to a canter, and the horse only accelerates the trot, hold it and go to a step. Then try to send the animal into a gallop right from the step. To do this, squeeze the sides of the walking horse with your feet and, as it were, push it forward, forcing it to go into a canter.
Once you have mastered all types of stride, trot, and canter, you can move on to more complex gaits.
Riding in the English style involves not only walking but also a fast gallop, jumping over obstacles, as well as training (experts call it dressage). However, this is already aerobatics for a rider, and it should be started when the basics are fully learned and worked out to automatism.
Western Style Horse Riding
This style differs from English primarily in that it involves a special technique of using the reins called “neck bridle”.
At the same time, the reins must be held freely, and the signals should be given by lightly touching your pet’s neck. For example, to turn to the right, the reins are shifted to the right side of his neck, with the left, respectively, to the left side. The reins should always be held in the left hand. The right one is usually placed on the saddle-bow.
As with driving in English, the body also takes part in controlling the animal – mainly the legs and pelvis.
If suddenly there is an urgent need to sharply change the direction of movement – use the English manner of management. The knight can ignore the soft signals of the Western-style, so take the reins with both hands and pull them in the direction you want to turn.
You should start with a step. The western riding style is characterized by easy side squeezing of the animal with the legs and pushing it with the heels. When riding in the West, the arms should also follow the horse’s head, however, since the reins are relaxed, the intensity of these movements is less than in English riding.
Having mastered the step, slightly squeeze the sides of the walking horse and let it jog (light trot).
Already in medium and fast trot, the western style is practically not used, not to mention the canter.
When jogging, keeping in the saddle is easy and comfortable, standing up in stirrups is optional.
Therefore, the Western-style is usually used for leisurely horseback riding.
Tips for Beginners
First of all, it is best to learn horseback riding in specialized equestrian schools under the guidance of an experienced instructor.
To establish the best contact with the animal, learn to saddle and bridle it. Try to look after your horse yourself. This will allow the animal to get used to you better, and your riding tandem will become more durable.
Always follow your coach’s instructions and follow safety instructions. Equestrian sport is a dangerous occupation, and neglect of simple rules can lead to very sad consequences.
Pamper your pet or pet with treats. Horses are very sensitive to affection and kindness to themselves, and in return give their devotion and love.
When taking the first steps in horse riding, choose only experienced and calm animals that are well trained and trained to walk under the saddle. Always wear a safety helmet.
Remain calm while driving. Horses are very sensitive to the rider’s mood and are nervous if he is afraid or uncomfortable.
When riding at a gallop – firmly squeeze the sides of the animal and sit deep in the saddle. Riding with shortened stirrups, in which the rider “hovers” over the horse, is a lot of professionals. If you are riding in unfamiliar terrain, carefully watch the road so that your horse does not injure his legs.
At first, you should not ride a horse alone. Let an experienced rider always accompany you.

